There are many ways to encrypt documents, however not all are secure, and we only support AES-256 encryption on zip files, with WinZip and 7-Zip.
To encrypt files in a zip file and password protect the file, there are two applications that GMPF support, WinZip and 7-Zip. Winzip is a commercial application and requires a license, however 7-Zip is a free use application, and can be downloaded at no cost from the 7-Zip website. Please note that you may have to check with your IT department before downloading or installing 7-Zip.
We have put together some instructions for how to zip a file in both WinZip and 7-Zip, and these are available below:
For any further information or help on using WinZip or 7-Zip, please see the product support pages for each.
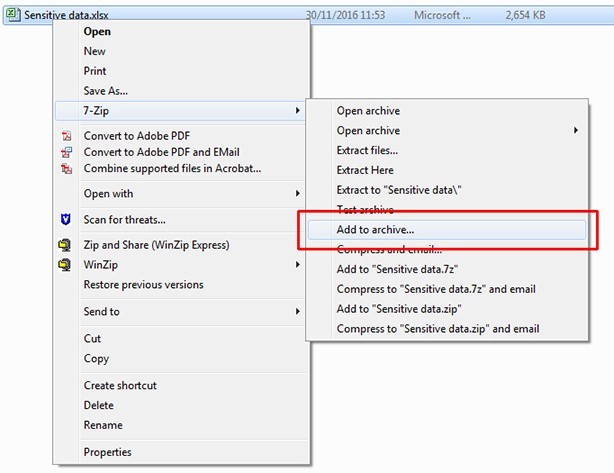
1. Right click the file, or group of files you would like to encrypt, go to '7-Zip' in the context menu, and then click 'Add to archive...'.
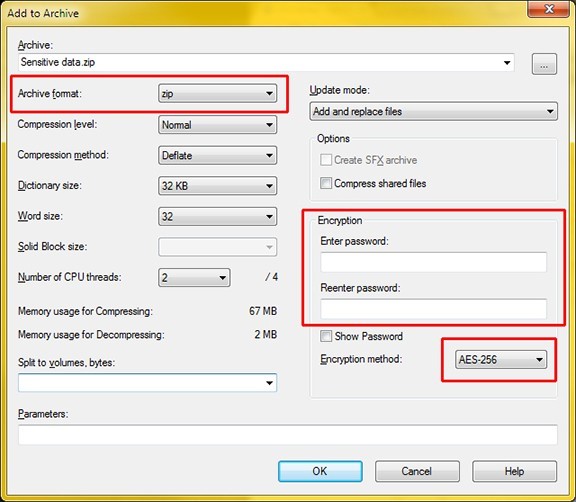
2. You will be presented with a dialogue box with the options for the zip file. Make sure that the options are set as shown in the image ('Archive format' set to 'Zip' and 'Encryption Method' set to 'AES-256'), and that a password is input in the password boxes. Please note that the password should never be sent via email as it could be intercepted, and instead should be delivered to us over the telephone. For the password to be secure it should conform to the following general rules:
- At least eight characters in length
Contain characters from three of the following four categories:
- Uppercase characters (A through Z)
- Lowercase characters (a through z)
- Numbers
- Symbols (e.g. !, $, #, %)
3. After clicking 'OK' the encrypted zip file will be created in the same folder as the files(s) you selected.

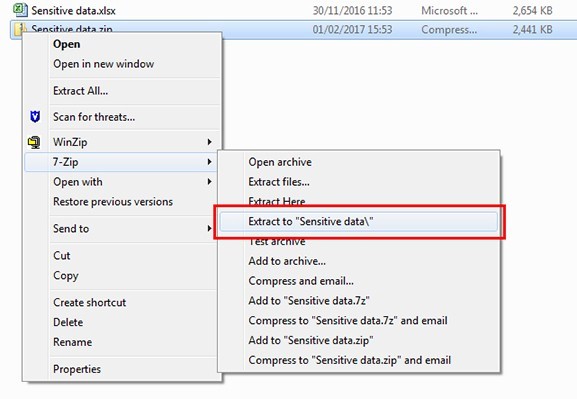
4. After encrypting a file it is advisable to check that the encryption works, and that the password is correct. To do this, right click on the file, go to '7-Zip' and click 'Extract to /<filename>'. 7-Zip will then ask for a password, and if successfully entered will place the contents of the zip file in a folder of the same name.
1. First, open WinZip from the start menu, and navigate to settings, then click 'Conversion Settings' and select 'Encryption' from the drop down menu.
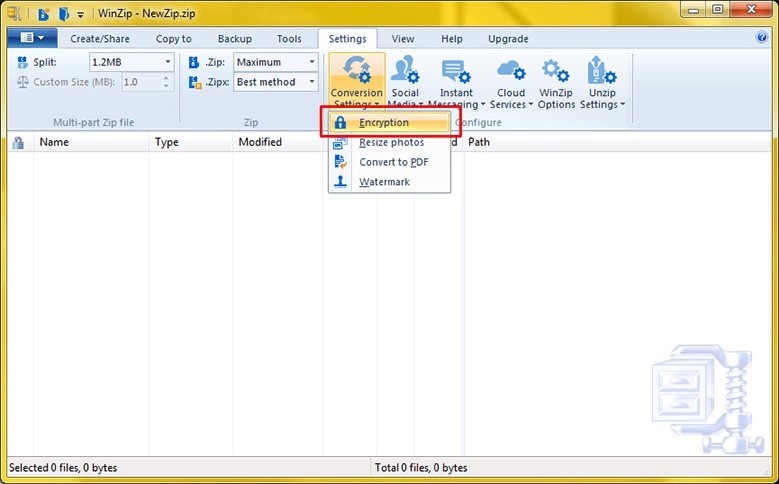 2. In the 'Encryption Options' dialog, select '256-bit AES' encryption if this is not selected.
 3. Right click the file, or group of files you would like to encrypt, go to 'Winzip' in the context menu, and then click 'Add to Zip file...
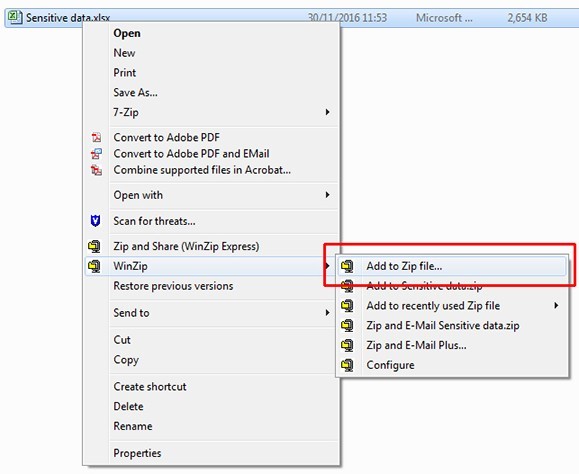
4. The 'Add' dialog will be brought up, and you will be given a number of options. Make sure that the options match the image (Compression set to 'Zip: Legacy compression, and 'Encrypt added files' ticked), then click 'Add'.
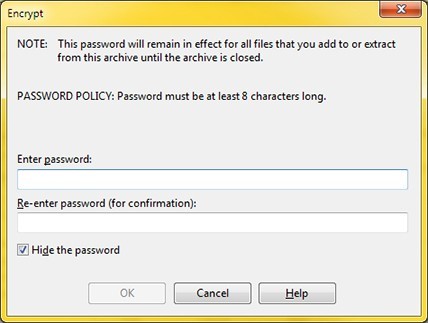
 5. Enter a password into the 'Encrypt' dialog window. Please note that the password should never be sent via email as it could be intercepted, and instead should be delivered to us over the telephone. For the password to be secure it should conform to the following general rules:
- At least eight characters in length
- Contain characters from three of the following four categories:
- Uppercase characters (A through Z)
- Lowercase characters (a through z)
- Numbers
- Symbols (e.g. !, $, #, %)
6. The encrypted zip file will be created in the same folder as the files(s) you selected.

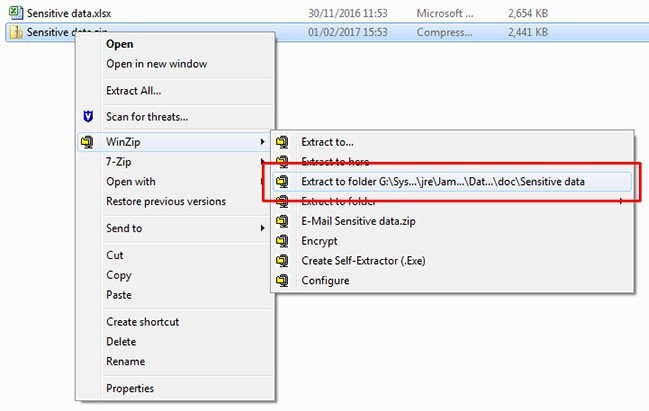
7. After encrypting a file it is advisable to check that the encryption works, and that the password is correct. To do this, right click on the file, go to 'WinZip' and click 'Extract to folder /<filepath>'. Winzip will then ask for a password, and if successfully entered will place the contents of the zip file in a folder of the same name.
Receiving an encrypted email
If there is any reason for us to query information with an employer which results in confidential information needing to be sent, we will do this via the Barracuda encryption service.
The process for receiving the email is as follows.
- You will receive an email from Barracuda to explain that a new encrypted email has been sent to you.
- You will receive a prompt to log into the Barracuda online portal or to create a new account if you have not done so previously. When creating an account, please be aware that your password must be at least eight characters long and contain at least one special character.
- Once logged in, you will be able to view the encrypted email.
- At this point Barracuda will send a read receipt to the sender.
- You will then need to reply to the email by clicking reply whilst in the Barracuda online portal.